CTF WRITEUP
K8s Lan Party Challenge
Check out the CTF if you want to try it out yourself and improve your Kubernetes hacking skills.
Challenge 1: Recon
DNSING WITH THE STARS: You have shell access to a compromised Kubernetes pod at the bottom of this page, and your next objective is to compromise other internal services further. As a warmup, use DNS scanning to uncover hidden internal services and obtain the flag. The challenge provides dnscan to make this easier in later stages.
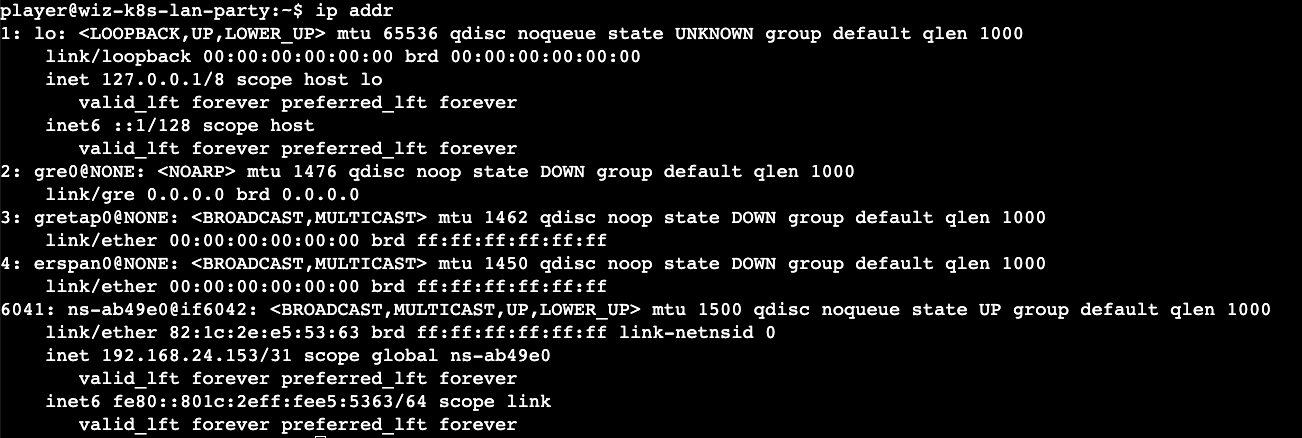
Whoami - As mentioned above you have access to a shell on the host 'wiz-k8s-lan-party' in the context of the user 'player'. On digging around you do not have to go off on (basic shell, no root, resource limitations etc.) To gain situational awareness in the container space, I generally start by looking at environment variables, users (/etc/passwd), sudo permissions and the Kubernetes secrets (which I wasted a lot of time on :-( to no avail)
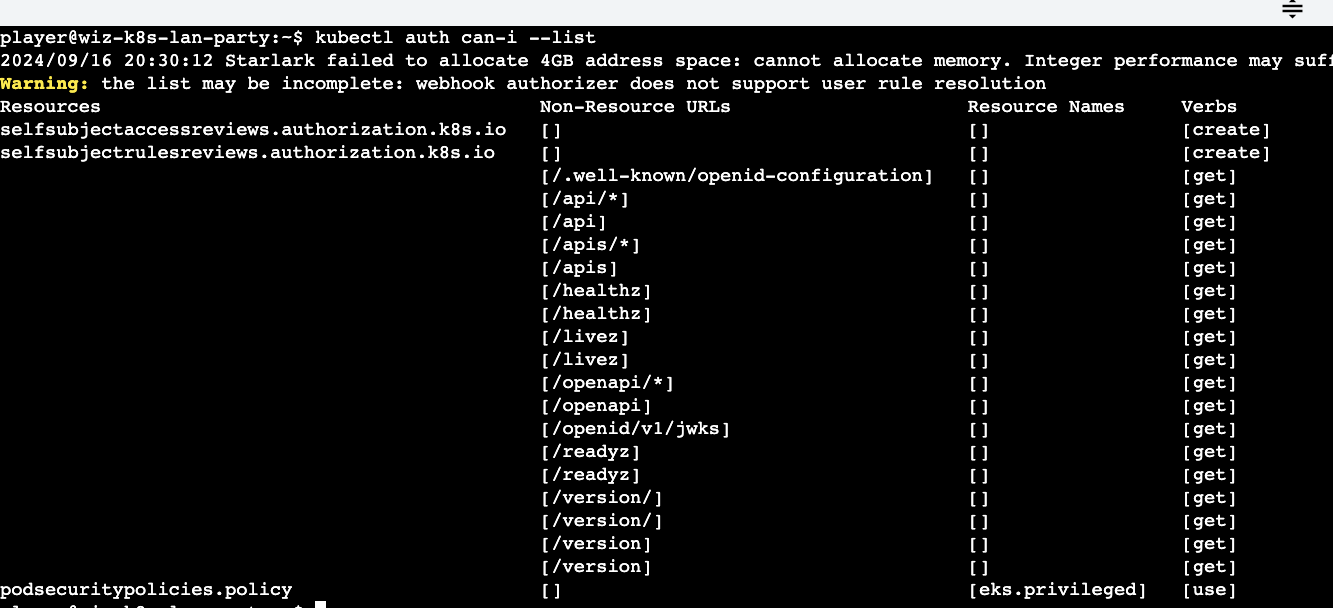
I also generally run the auth list command to identify any permissions on individual Kubernetes objects across all namespaces.
Solution - In a Kubernetes environment, my first step is to always check the environment variables using the env command as many of the Kubernetes configurations, API server information etc. might be captured.
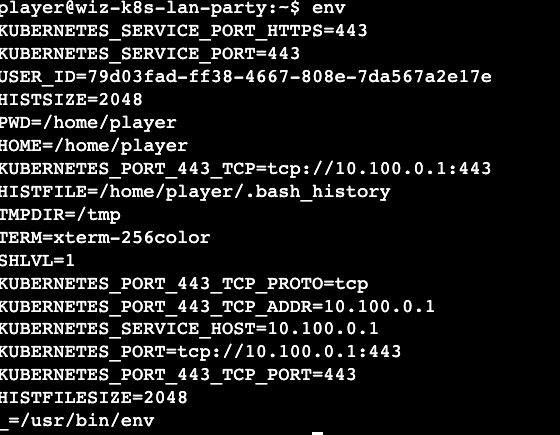
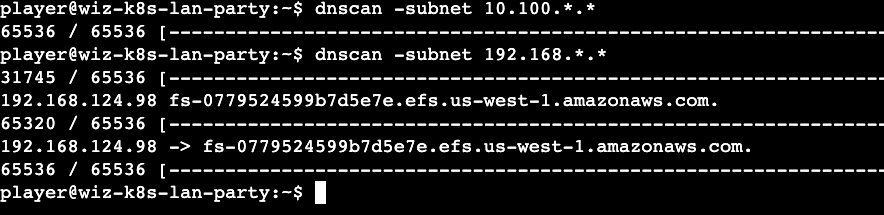
We have two IP ranges that might be of interest to us (10.100.* & 192.168.*) and since the challenge mentions the tool 'dnscan' we can use that tool to scan the IP ranges. Kubernetes services are discoverable through DNS and this can shed light into understanding what services exist and see if we can exploit them.
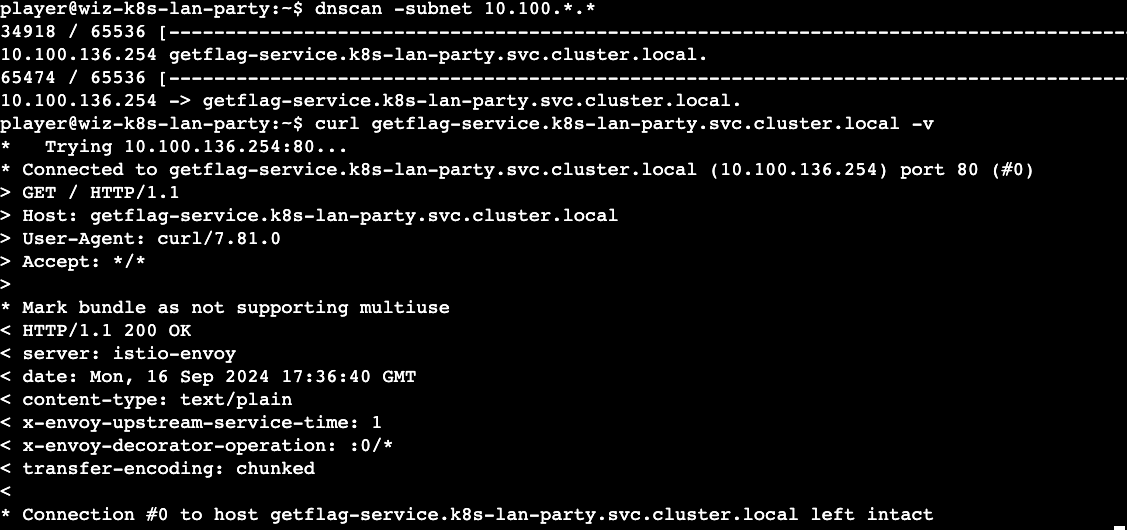
We discovered one service (get-flag-service) which could be our first flag. A quick curl ( I use the -v option to see what I am sending in the request and to avoid panic! ) confirms our hunch.
Takeaways
- Understand your current context and look for env, user access and network information.
- You can run 'dnscan' using 'nmap' as well (you have access to 'nmap')
- Be on the lookout for forward (A), reverse (PTR), and service (SRV) DNS records.
- Kubernetes DNS can expose internal service names quickly, even when direct network visibility is limited.
Challenge 2: Finding Neighbors
Hello?: Sometimes, it seems we are the only ones around, but we should always be on guard against invisible sidecars reporting sensitive secrets.
context - A sidecar in Kubernetes is a secondary container that runs alongside the primary container in the same pod (share the same resources, namespace) and support additional functionality such as data transfer, logging (<3) and monitoring (<3<3). Worth looking for any sidecar containers running which might give us the flag.
Solution - Now that we know the Kubernetes cluster subnet and the availability of the 'dnscan' tool. We can perform the scan once again to identify any services that might point us in some direction.

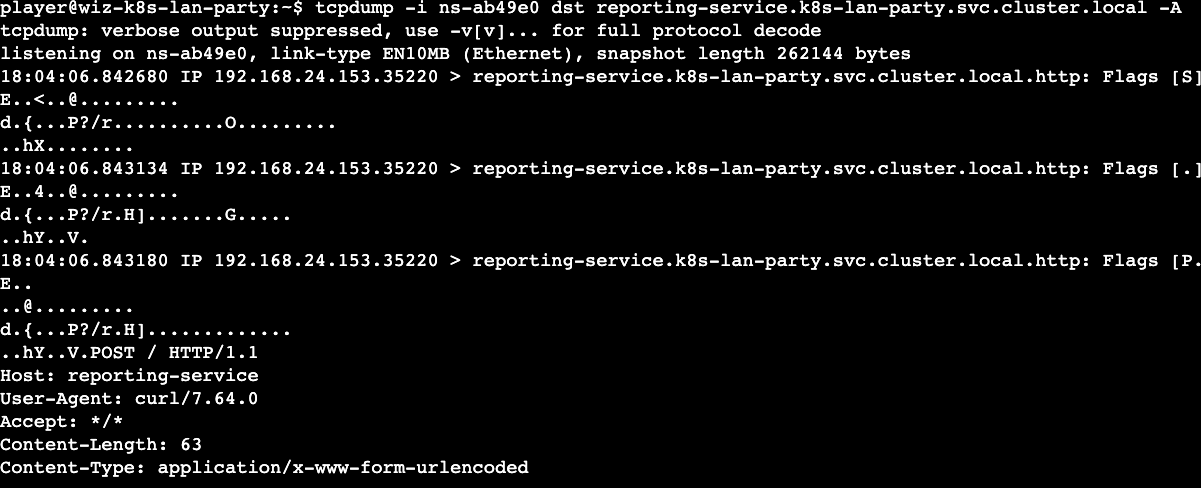
A quick 'curl' (-v) to the reporting-service shows that it is accepting connections. The HTTP headers show us that this is an 'istio envoy' server. A quick web search for this reveals that it can be used as proxy sidecar container that handles incoming and outgoing traffic. We also discovered that the port 80 is accepting connections and this reasonably points us to using tools such as 'wireshark', 'tcpdump' to figure out what is being sent over the wire.
Note: I was stuck here for quite some time as I did not do an inventory of the tools available to me. Once I discovered that tcpdump is available I did some digging on how to use it.
Moving on, we need the interface (-i) flag to sniff using 'tcpdump' and the source or destination as parameters. Since this is a sidecar container and we have a network namespace ('ifconfig'), it is a good starting point. The -A flag which I figured out provides the output in ASCII. Voila! we get our second flag.
Takeaways
- Primary and sidecar containers share the same network namespace.
- If a service is running on port 80, use Wireshark or tcpdump to gain insight into the network communications.
- Always inventory the tools available in the environment before assuming a path is blocked.
Challenge 3: Data Leakage
Exposed File Share: The targeted big corp utilizes outdated, yet cloud-supported technology for data storage in production. But oh my, this technology was introduced in an era when access control was only network-based.
context - The mention of data storage in a Kubernetes context immediately points me to look for volumes / file shares mounted. Cloud supported technologies could also mean that we are dealing with data storage services in (GCP, AWS, Azure). As mentioned above I failed to run any 'kubectl' commands utilizing the secrets available which stopped me from pursuing pod configurations to reveal volumes etc.
Solution - Once again, I utilized 'dnscan' to scan the subnets and this revealed an Amazon Elastic File System (EFS). I wasted a lot of time trying to mount (without sudo) and enumerate any files by abusing NFS version vulnerabilities that might reveal the answers.
Finally, after the 'mount' rabbit hole, I ran the 'df' command that provides the free disk space statistics and mounted filesystems. I figured out that the EFS was already mounted at the path (/efs). The flag file existed there but the 'player' user has no permissions on the flag file. The flag file was owned by daemon (UID 1, GID 1). I wasted a bit of time trying to find files owned by daemon to abuse via lolbins. I gave up after some time and looked for other alternatives. This involved revealing the first hint.

Hint reveals two tools that can be of use:
nfs-ls - List NFS servers, exports or directories.
nfs-cat - Read a file from the NFS server.
The above hint was of great help as this made me stop looking for ways to become 'daemon' and directly querying the EFS to display its content. Since this is the first time I came across these tools, I wasted a lot of time with trial and error. I eventually figured out that the EFS should take a version number that might be part of the request. On trying both versions (3 & 4), I could move the needle.

Now we are getting somewhere. On querying for the file via the URL, we get an nfs access error which suggests that we have to be daemon to get the flag file. By providing the UID daemon rather than UID 1 as a parameter we finally reveal the flag.

Takeaways
- As the challenge mentioned, network reachability alone is not a sufficient security boundary. We need to provide some form of AAA to access sensitive files in the shares that are accessible across the enterprise.
- Always spend some time on situational awareness before chasing an exploit path.
- Check mounted filesystems before trying to mount the same share manually.
- Do not forget URL encoding when passing parameters through tools or shell commands.
Challenge 4: Bypassing Boundaries
The Beauty and The Ist: Apparently, new service mesh technologies hold unique appeal for ultra-elite users (root users). Don't abuse this power; use it responsibly and with caution.
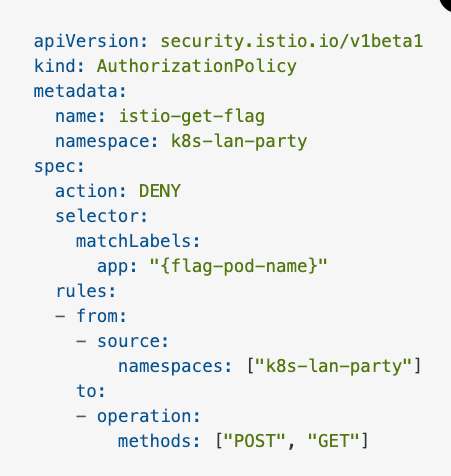
context - Based on the description, it looks like we can abuse root privileges to get the flag and for the first time we are root in the shell (exciting!). I also learned (here) that the service mesh recon via 'nmap' or other tools shows that all the ports are open and listening as the service mesh probably mediates network traffic. Finally I utilized ChatGPT to summarize the policy above which was very useful. In its own words:
"This Istio AuthorizationPolicy deniesPOSTandGETrequests from thek8s-lan-partynamespace to a pod labeled as{flag-pod-name}."
My initial thought process was to probably get to a namespace where the above parameters do not apply or utilize other HTTP methods not denied to get the flag.
Solution - Again, started off with 'dnscan' to identify services that are available for us to pursue. A curl (-v) to the below service hits us with a '403 Forbidden' error.
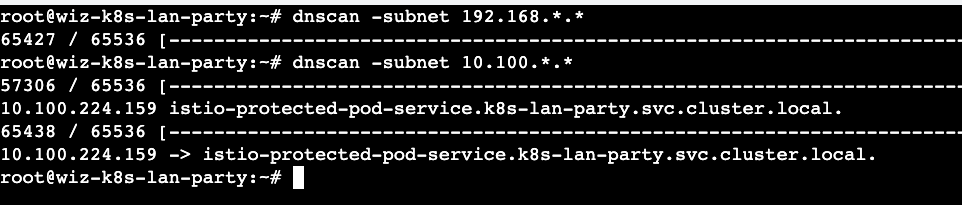
A 403 Forbidden response to me reveals that I need some form of credentials to gain access. It is fair to assume that the service runs in the context of a non-human account. Thanks to our initial recon (/etc/passwd) , I realized that there is a user 'istio' (1337). I am always curious when I see '1337' in CTFs and make a note of it for a potential opportunity. On digging further I realized this was not intentional but 'istio' actually runs as 1337 (here) and running any other workloads with that uid will cause problems.
Since I am root in this challenge, I tried switching to the context of the 'istio' user and obtained the flag.

Takeaways
- Running as root is a huge red flag in the container space.
- 'Istio' could probably have exceptions in iptables for uid 1337
- 1337 is not always leet and intentional.
- Service mesh behavior can depend on identity, UID, and proxy exceptions, not just HTTP method and namespace.
Challenge 5: Lateral Movement
Who will guard the guardians?: Where pods are being mutated by a foreign regime, one could abuse its bureaucracy and leak sensitive information from the administrative services.
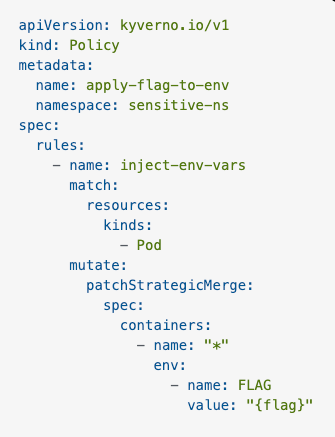
context - Based on the administrative services link, the challenge has something to do with Kubernetes admission control (whoa!). The AdmissionReview request is a Kubernetes API object used in the admission control process to intercept and modify or validate resource requests. It has two components:
- Request: Contains details about the resource being created or modified, including the object itself, the user making the request, and the operation (create, update, delete).
- Response: The webhook sends back a response indicating whether the request should be accepted, denied, or modified.
In my new friend ChatGPT's own words
" This Kyverno Policy injects an environment variableFLAGwith the value{flag}into all containers in Pods within thesensitive-nsnamespace. "
This shows that I have to send an AdmissionReview request (Content-Type: application/json , POST) to somehow get the environment variable back. I might need some k8fu which I lacked and completely ignored this method. The other alternative was to somehow get access to the containers in the namespace or launch a container in that namespace to get the environment variable.
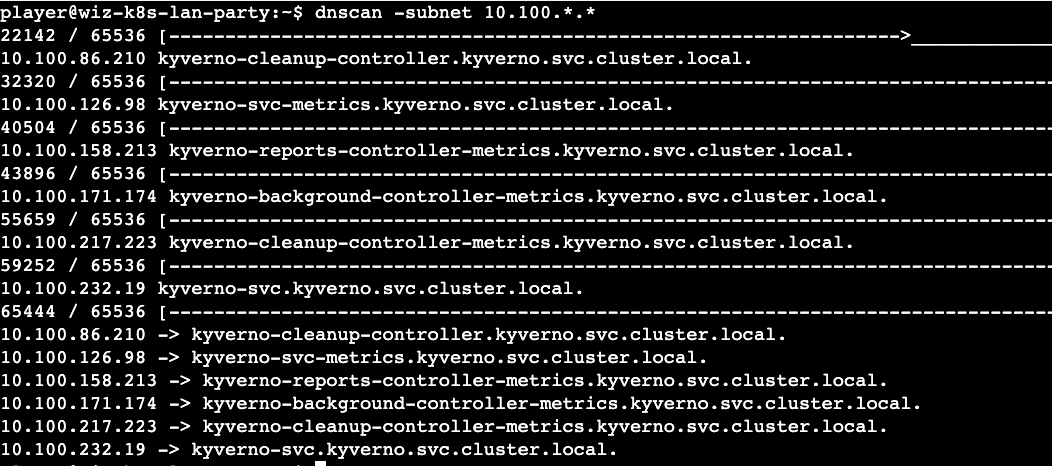
solution - For the final time, I started off with the 'dnscan' utility to discover available services and it did not disappoint this time and made me wonder which one should I go after.
As mentioned above, my plan was to create a pod in 'ns-sensitive' namespace or get access to one. I reverted back to utilizing the secrets available in the location (/var/run/secrets/kubernetes.io/serviceaccount) to gain legitimate access to the Kubernetes cluster. This did not lead anywhere and I eventually succumbed to utilizing the hint again. The hint revealed a 'kube-review' tool which helps create AdmissionReview requests. Alas! I had to go this route and create some templates.
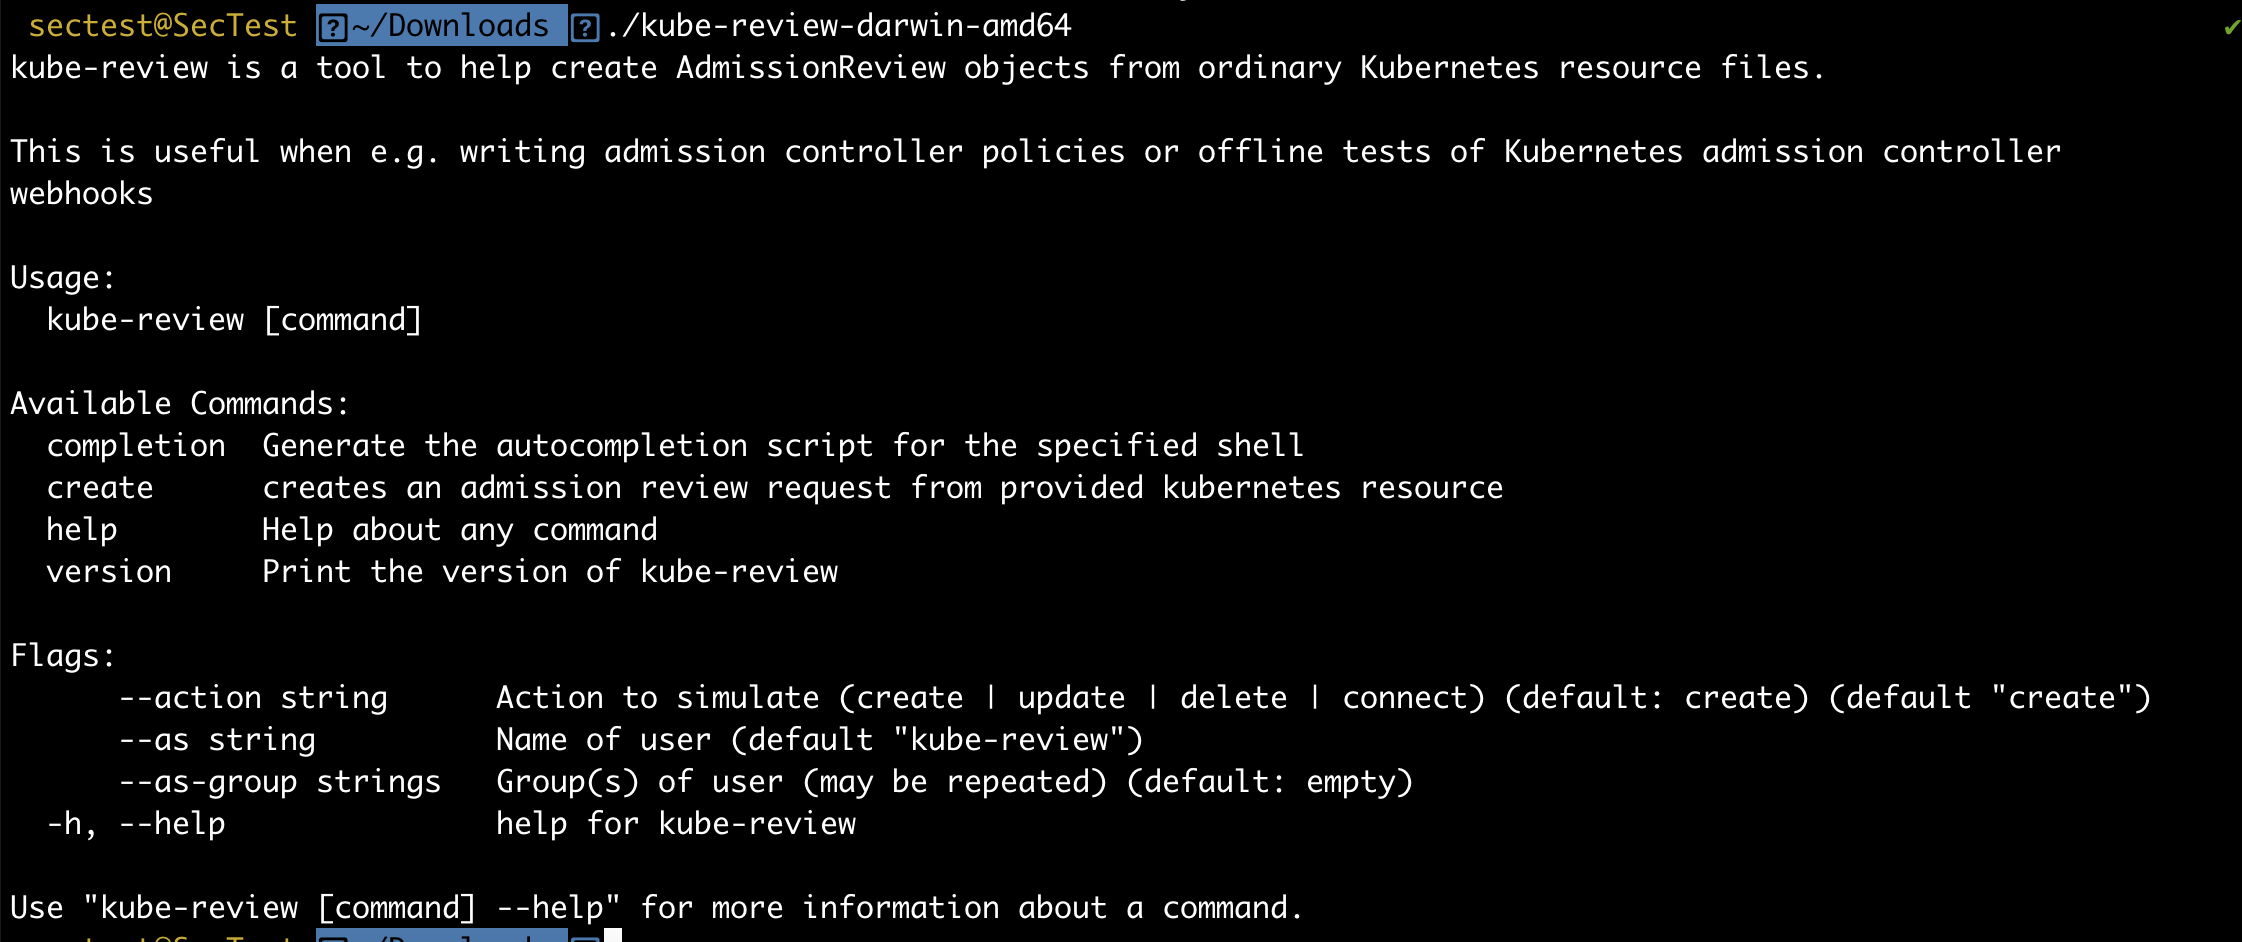
Ok, the tool helps create an AdmissionReview request. The tool does not exist on the shell provided but I realized git was available to pull the repository. I however tried testing this in my lab environment as I could not create any large files in previous challenges. I eventually wondered how I would create the AdmissionReview request file but I realized I had permissions to write to files in the current shell context.
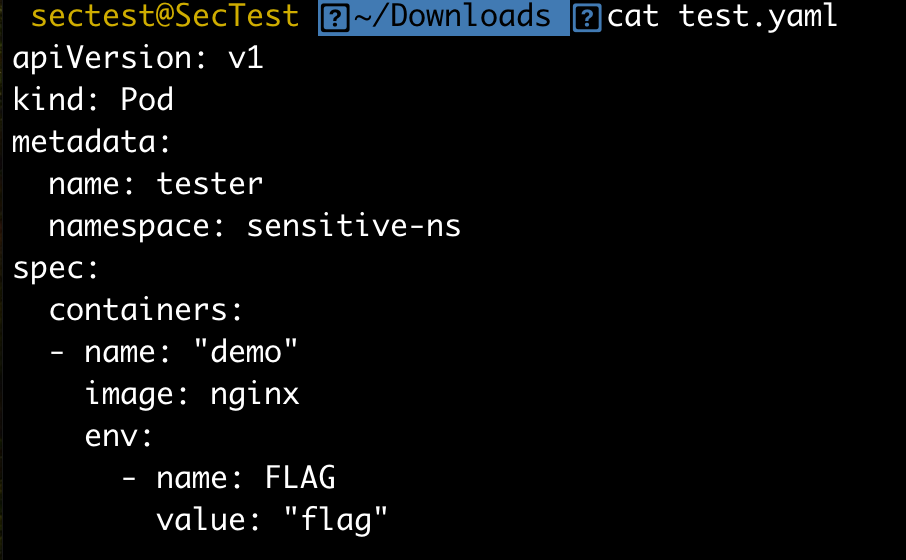
The 'kube-review create' command expected a YAML template to create an AdmissionReview request for. My hunch was to create a pod and the environment variable will get injected as part of my request. On experimenting multiple YAML files on my lab, I eventually realized that I need to provide an environment variable with a dummy value to actually make it work rather than it directly populating the flag env variable by itself.
After a lot of trial and error, I revealed the second Hint which showed that I need 3 parts to solve the problem.
- The hostname: we have this based on the 'dnscan' results.
- The HTTP path: Look through 'kyverno' source code (yikes)
- AdmissionReview request: we have this based on the 'kube-review' output
I started looking for all 'kyverno' mutate rule paths that I could find and eventually figured out the exact path (here) rather than going the route of spinning up a Kubernetes cluster with 'kyverno' to figure out the response for the mutating webhook request.
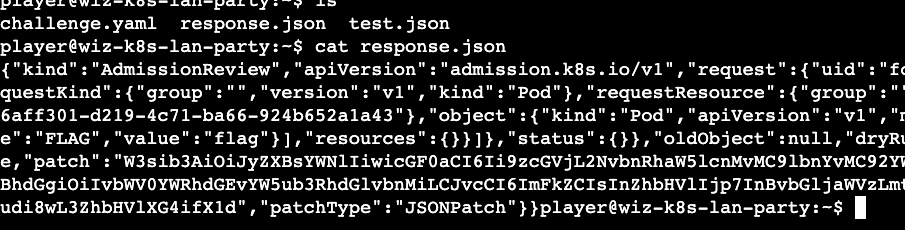
Based on my experience with Kubernetes, this should be base64 as most of the sensitive secrets are stored in the base64 format. A quick use of the base64 (-d) reveals the final flag.

Takeaways
- This was the most difficult one of all and required some prerequisite knowledge on Kubernetes and 'kyverno' policies. I will update the exact learning once I do a little bit more research into the security context of dynamic admission control.
- Pay close attention to mutating admission policies that enforce custom defaults. If they inject sensitive values or trust malformed requests, they can become an attack path.
- Shout out to 'Anders Eknert' for kube-review tool